🧱 Vertical Gardening with Grow Bags
🔥 Think Up, Not Out
Ever feel boxed in by your space before you’ve even planted a seed?
You look around — a narrow patio, a small yard, maybe just a balcony railing. It’s enough to grow something... but it never feels like enough to grow everything you want.
Here’s the truth:
You don’t need more ground — you need more gravity.
Because the secret to small-space abundance isn’t out... it’s up.
Vertical gardening with grow bags isn’t just a space-saving trick.
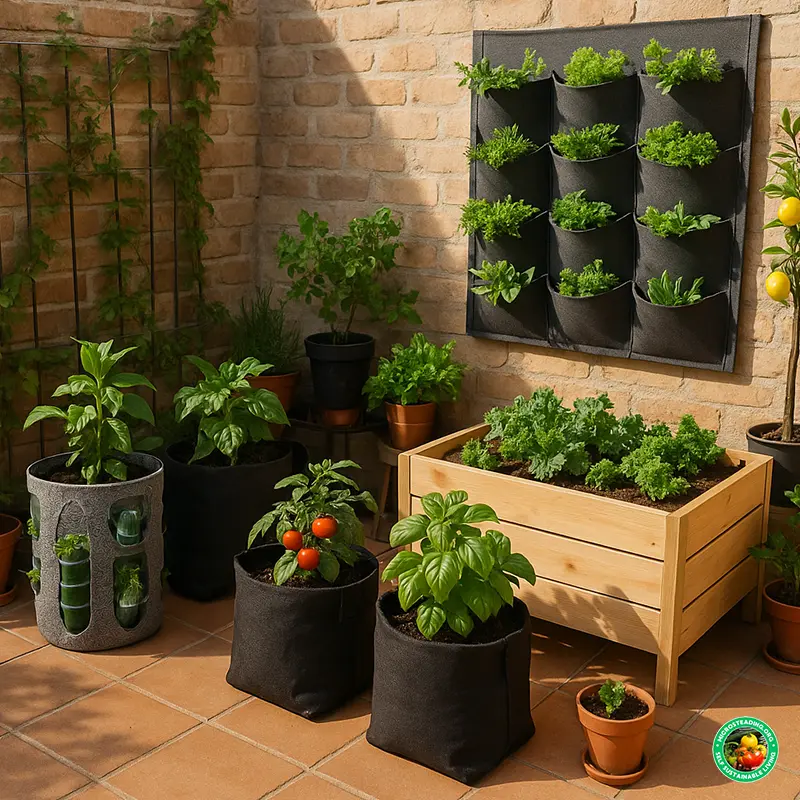
It’s a yield-multiplying system that transforms your fence into a farm wall, your balcony into a living pantry, and your sunny wall into a stacked salad station.
This article is your blueprint. You’ll discover:
✅ Which crops actually thrive in vertical setups
✅ How to build a vertical grow system with basic tools (or bottles!)
✅ Where to place plants for sunlight, drainage, and harvest access
✅ How to avoid the most common vertical garden mistakes that ruin yields
Whether you're microsteading on a balcony or stacking harvests on a homestead, this is your guide to growing up — literally.
🧠 Why Vertical Gardening Makes Sense
Let’s get one thing straight:
👉 Small space doesn’t mean small harvest.
In fact, some of the most productive gardens are grown without a single square foot of bare earth.
Vertical gardening with grow bags turns forgotten spaces—walls, fences, balcony railings—into food-growing real estate. It’s more than clever—it’s strategic.
Here’s why vertical growing works so well:
✅ Increased Planting Area
Think about it like shelves in a pantry.
You wouldn’t pile all your jars in one layer — you’d stack them to use the full volume.
Vertical gardening works the same way.
Every foot of height you add increases your available growing zone, without needing more land, containers, or patio tiles. That means more crops, variety, and yields from the same footprint.
✅ Improved Airflow and Pest Control
Plants grown off the ground experience:
- Less soil splash (which spreads disease)
- Fewer crawling pests like slugs and cutworms
- Better circulation around leaves — especially important in humid zones
This reduces disease pressure and keeps your garden healthier with less effort.
✅ Easier Harvesting
No more bending. No more kneeling.
You can pick your salad without crouching in the dirt when your herbs, strawberries, or leafy greens grow at chest or eye level.
This makes vertical gardening ideal for:
- Older growers or those with mobility issues
- Daily harvesting routines
- Low-maintenance microsteads
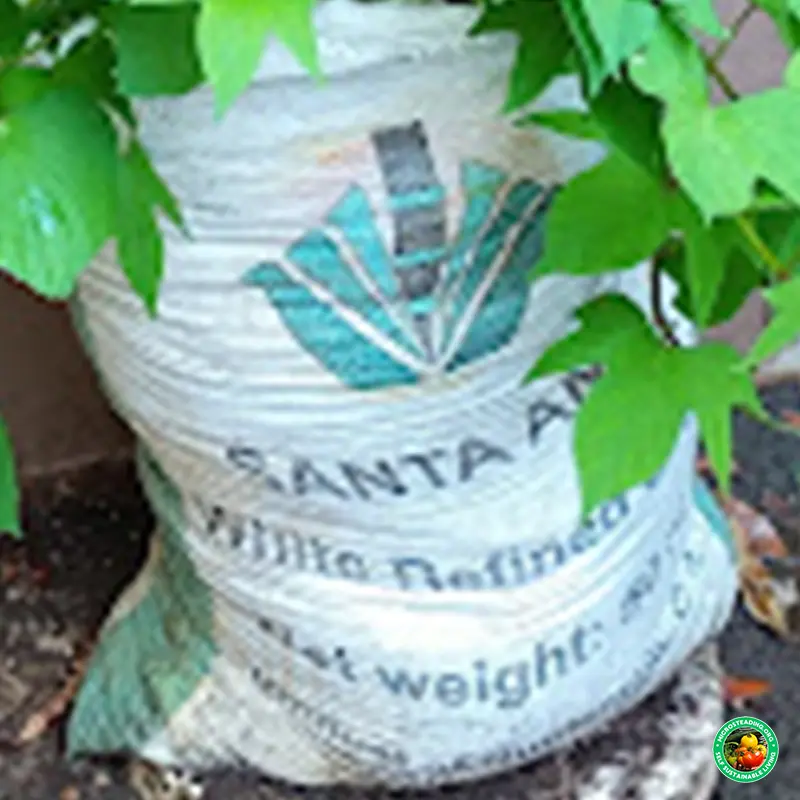
✅ Ideal for Patios, Balconies & Urban Walls
You're in business even if your entire “garden” is a fire escape or sunny patio wall.
Vertical grow bags can:
- Hang from hooks or rails
- Strap to fences
- Mount on brick, wood, or even balcony railings
- Stack up along a sunny exterior wall
With just 3 feet of wall space, you can grow 10+ herbs and greens.
🌿 Real-World Case: Vertical Strawberry Wall
Take a look at the image below:
This grower used basic fabric grow bag pockets and zip-tied them to a horizontal pipe stand.
🖼️ Strawberries in Vertical Grow Bags:
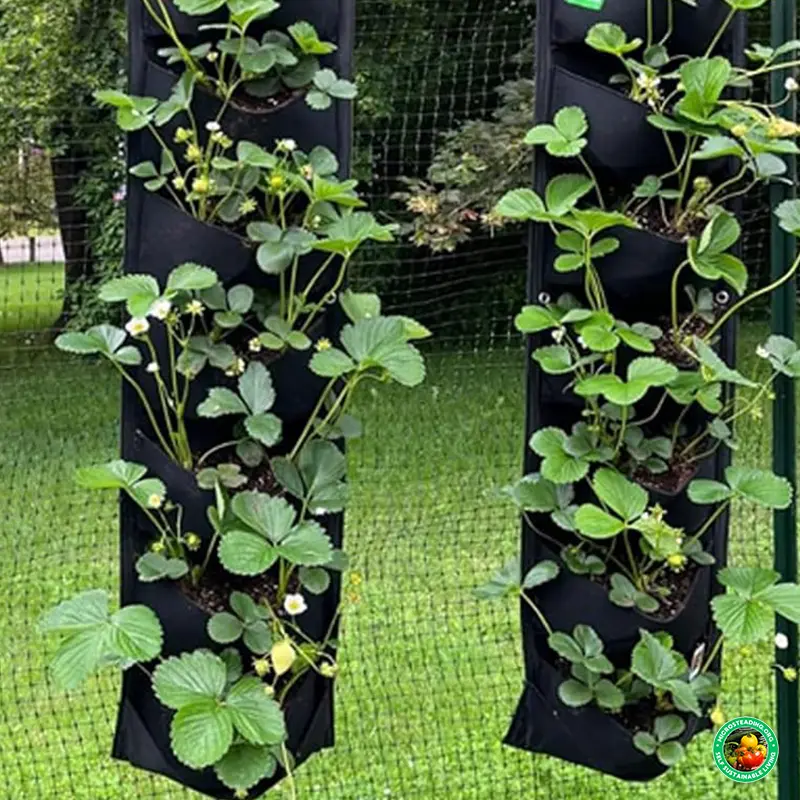
These strawberries are:
- Grown entirely above ground
- Supported by breathable bags
- Spaced for sunlight and airflow
- Easy to pick without kneeling
That’s not just pretty — that’s productive.
Vertical gardening gives you the power to turn surfaces into systems.
And now that you know why it works… let’s talk about what to plant next.
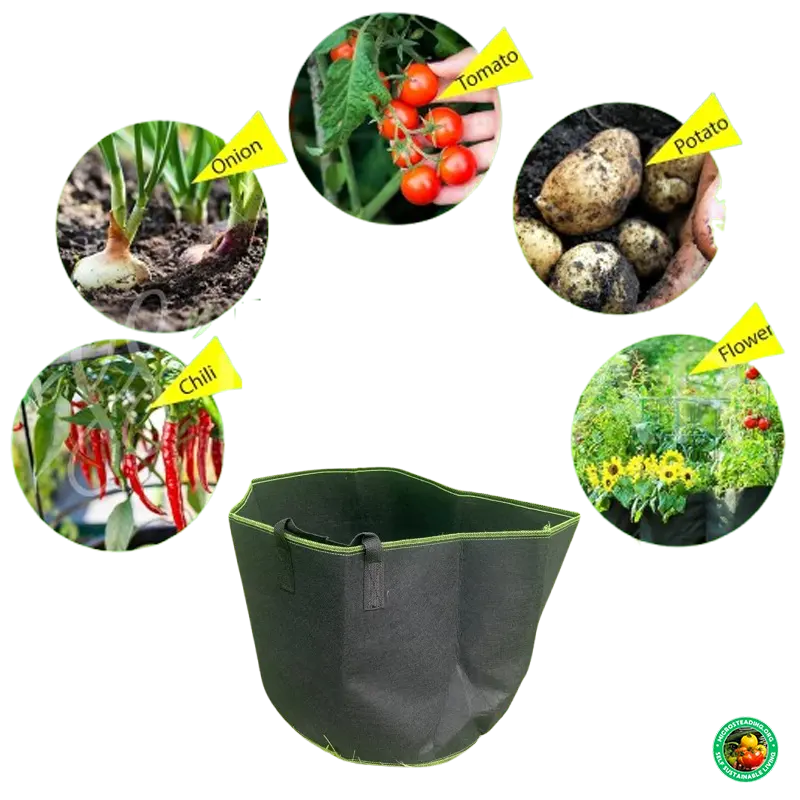
🌿 The Best Crops for Vertical Grow Bags
Not every plant wants to live life off the ground.
Some crops have deep roots, others sprawl wide or become too heavy to support safely, but some absolutely thrive in vertical setups, especially when grown in breathable, well-drained grow bags.
So what makes a plant vertical-worthy?
✅ Characteristics of great vertical grow bag crops:
- Shallow, fibrous root systems
- Compact or upward growth habits
- Low overall weight
- Responsive to pruning or trimming
- Bonus: tolerance to inconsistent moisture or temperature swings
If that sounds familiar, it should — because we already covered the best crops for general grow bag success in our article:
👉 Top 5 Crops That Thrive in Grow Bags
However, in vertical systems, the selection becomes even more focused.
Let’s look at the true champions of the upright garden.
🥬 Leafy Greens (Lettuce, Spinach, Arugula, Chard)
Lightweight, shallow-rooted, and lightning-fast to grow, leafy greens are tailor-made for vertical setups.
- Perfect for small 1–3 gallon side-pocket bags
- Minimal structural weight
- Harvestable in as little as 30 days
- Rotate new plantings every 2 weeks for nonstop greens
💡 Pro tip: Use bottom-tier pockets for arugula or chard — they thrive in cooler, shaded zones.
🌿 Herbs (Basil, Thyme, Cilantro, Oregano)
If you only use one vertical panel, fill it with herbs. These crops don’t just grow well — they grow better when pruned regularly. That means vertical harvesting keeps your plant thriving.
- Minimal water needs
- Naturally compact
- Most tolerate shallow pockets or pouch-style grow bags
- Incredible ROI per square inch (a single basil plant pays for itself by week 3)
💡 Place sensitive herbs like cilantro or parsley on middle or lower rows to avoid leaf burn.
🍓 Strawberries
This is the poster child for vertical fruiting in small spaces. Strawberries trail, sprawl, and send out runners, and grow bags help control that wild energy. Plus, hanging or stacked systems protect fruit from soil rot and slug attacks.
- Look for everbearing varieties for extended harvest
- Use 5–10 pocket vertical bags or strawberry towers
- Feed monthly for best yields
📷 Use your earlier image here again to visually reinforce success.
🫘 Pole Beans and 🥒 Mini Cucumbers (with Trellis Support)
Yes, you can grow climbing crops vertically, not just on the ground. Pair your vertical grow bag with a side-anchored trellis or netting, and train vines upward from a lower tier.
- Beans and cucumbers do best with 5+ hours of sun
- Make sure your structure is secure — these get heavy when fruiting
- Harvest regularly to encourage continual growth
💡 Choose mini or pickling cucumber varieties to avoid overburdening your system.
🍅 Runner-Ups (Still Worth Trying):
- Lettuce blends and mesclun – great for tight pocket rows
- Mint – super hardy, great for shade tiers, just don’t let it spread out of control
- Dwarf tomatoes – do well in 5–7 gallon vertical racks, but need more feeding and support
⚠️ Avoid indeterminate (vining) tomatoes unless you love daily pruning and high-maintenance staking
The secret to success is to start with compact, quick-growing crops that love airflow and don’t mind shallow soil. These are the workhorses that will fill your vertical garden with flavor, color, and yield — fast.
📐 Design Options for Vertical Systems
Once you know which crops thrive vertically, it’s time to build the structure that supports them. Vertical gardening isn’t a one-size-fits-all setup — and that’s good. Your chosen system can match your space, tools, and creativity.
Below are the four most practical and proven grow bag configurations. Whether you're using fabric pockets, recycled bottles, or a custom wood frame, a vertical method will fit your microstead like a glove.
⚙️ Hanging Grow Bags on Walls or Fences
This is one of the simplest and most scalable options. Hang side-pocket grow bags or fabric pouches from a secure vertical surface like a wooden fence, chain-link, balcony railing, or masonry wall.
- Use heavy-duty hooks, screws with washers, or zip ties to anchor bags
- Ideal bag size: 1 to 3 gallons per pocket
- Keep vertical spacing at least 12 inches to avoid shading the row below
- Best for: herbs, strawberries, leafy greens
💡 Mounting on chain-link fencing allows for airflow behind the bags and easy repositioning.
🪜 Tiered Rack Structures (Wood, PVC, or Shelving)
If you want a freestanding vertical system, a tiered grow rack is the way to go. This can be built from reclaimed lumber, PVC pipe, or even metal shelving units with trays.
- 2–3 vertical tiers work best without overloading
- Use 5–7 gallon bags for lower tiers, and smaller bags above
- Allow at least 14–16 inches between tiers
- Place on level ground, patio, or even rooftop setups
- Trellising can be added behind to support climbing crops like beans or mini cucumbers
💡 If using wood, coat with natural sealant or line shelf bottoms with trays to avoid water damage.
🧱 Wall-Mount Grow Panels
Think of this as a living garden poster on your wall. These are usually fabric wall hangers with 6 to 36 small pockets. They're ideal for lightweight crops and herbs.
- Secure firmly at the top and sides to prevent sag
- Water slowly to avoid uneven soak-through or runoff
- Upper pockets receive the most sun and dry out fastest — plant accordingly
- Works well on east or south-facing brick or wood walls
💡 Reinforce your wall first if attaching to siding or exposed surfaces — water weight adds up fast.
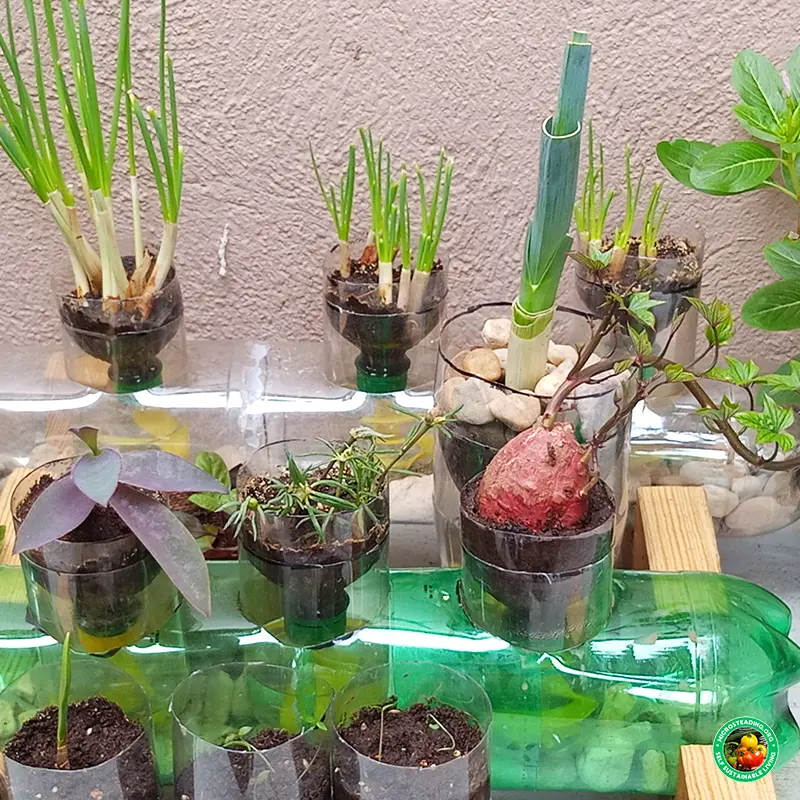
🧪 Bonus: Bottle Towers or Vertical Tubing Columns
Built from recycled 2-liter soda bottles or vertical PVC tubes with cutouts. Stackable and cheap, but requires precision drainage and support.
- Great for greens, mint, and shallow-root crops
- Wick systems or gravel reservoirs can be added to the base
- Space bottle openings at least 6–8 inches vertically
💡 Your soda bottle setup is a perfect example — compact, clever, and adaptable.
Sunlight Placement Strategy
Every vertical system creates microclimates. Use this to your advantage.
- Top tier = sun lovers (peppers, strawberries, cucumbers)
- Middle = moderate light crops (lettuce, parsley, basil)
- Bottom = shade-tolerant plants (mint, arugula, chard)
If you're working with an east-facing surface, use it for morning sun lovers like greens and herbs. South-facing walls are better for heat-loving crops and flowering fruiters.
Use reflective materials like whiteboards or foil behind shaded tiers to bounce light upward. If your system is mobile, consider rotating it weekly for balanced exposure.
🧰 Materials + Setup Tips
Before you hang that first grow bag or build your first frame, you’ll want to ensure you’re working with the right parts and plan.
This section provides everything you need, including bag sizing by crop, spacing layouts, and the most effective ways to secure your grow bags safely and permanently.
Think of it like your vertical gardening toolkit — simplified, smart, and built for harvest.
✅ Bag Size Recommendations by Crop
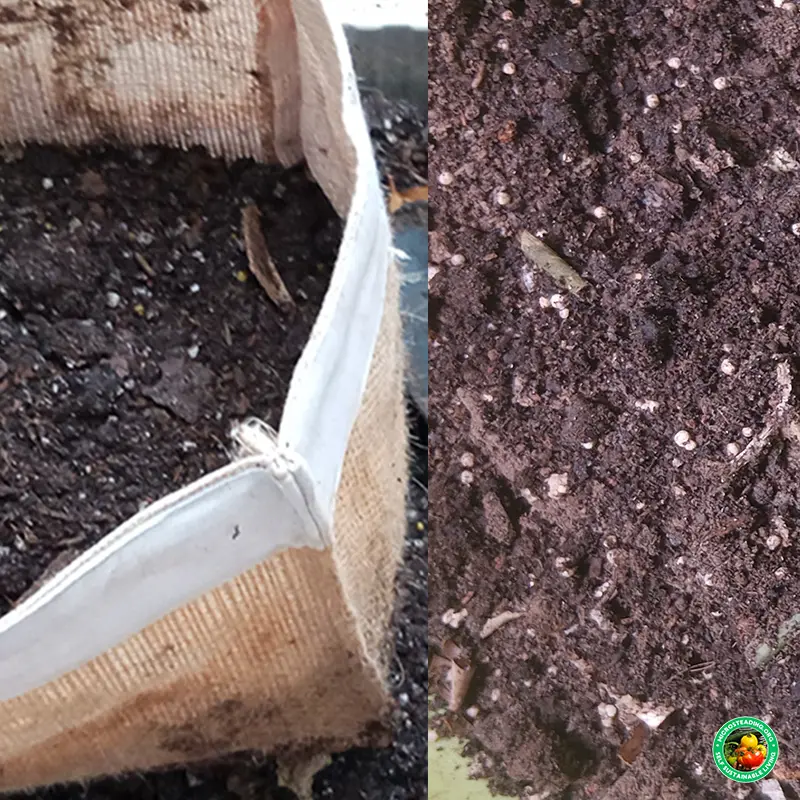
Choosing the right grow bag size is mission-critical. Go too small, and roots get tangled and compacted. Go too large, and you’ll waste soil and stress your supports.
Here’s a quick cheat sheet:
-
1–2 gallon bags
Great for: herbs (basil, thyme, oregano), radishes, green onions -
3–5 gallon bags
Great for: lettuce, spinach, arugula, strawberries, bush beans -
7–10 gallon bags
Great for: peppers, dwarf tomatoes, bush cucumbers
💡 The higher the placement on your wall or tower, the smaller and lighter the bag should be.
✅ Spacing Between Rows (Vertical and Horizontal)
Give your plants and bags enough space to breathe, drain, and soak up sun.
-
Vertical spacing
Minimum 12 inches between bag rows
14–16 inches for larger plants like chard, bush beans, or anything fruiting -
Horizontal spacing
Side-by-side bags should be at least 8–12 inches apart to prevent overcrowding and shading
💡 If using pocket panels, check how far each pocket protrudes. Deeper pouches = more space needed between vertical rows.
✅ How to Mount Bags Securely
Safety first — grow bags filled with wet soil can get heavy. Use strong, weatherproof mounting hardware to prevent collapse or tearing.
Best mounting methods:
-
Hooks with washers
Screw directly into wood fences, walls, or beams -
Zip ties
Fast and flexible — ideal for chain-link fences or lightweight grid panels -
Screw-in brackets or L-brackets
Best for long-term vertical towers or heavier bags -
Trellis grid panels
Great for renters — these can lean against walls without permanent damage
If you're growing on brick or concrete, use masonry anchors and stainless screws. Don’t trust adhesives or weak hooks — once saturated, grow bags can weigh up to 10–15 pounds each.
💡 Always test your mounts with water weight before planting. A dry bag isn’t the final load.
Tools and Materials Checklist
Here’s what to gather before you build your vertical setup:
- Grow bags (1–10 gallon mix)
- Drill and weatherproof screws
- Zip ties or galvanized wire
- Mesh panel or trellis grid (optional)
- Hook hardware or shelf brackets
- Scissors, measuring tape, and level
- Landscape fabric (for lining or backing)
- Trays or shallow bins for bottom drip catch
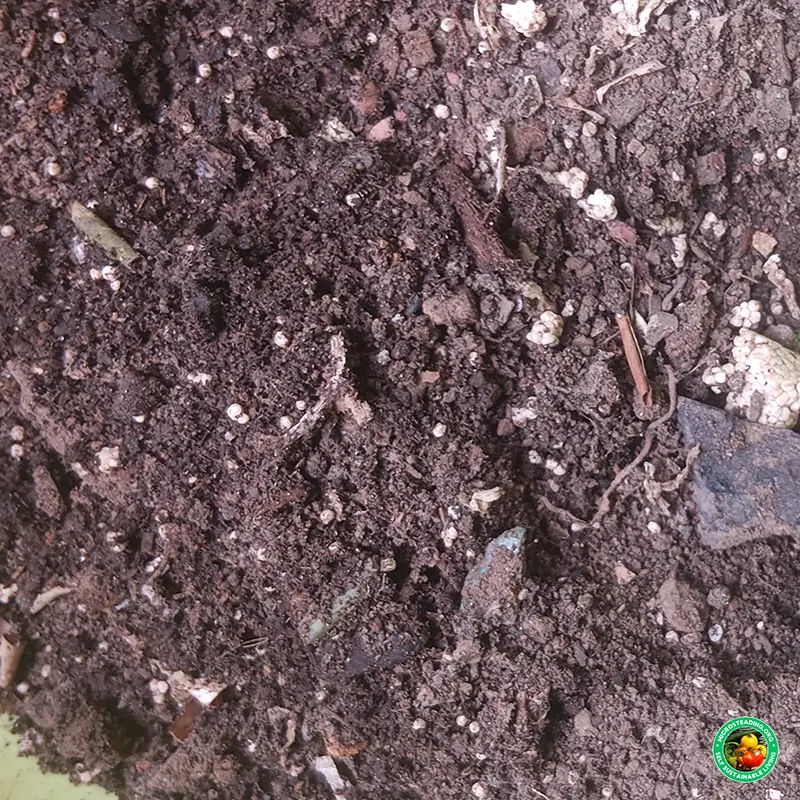
- Organic soil mix (refer to Best Soil Mixes for Grow Bags)
Optional bonus items:
- Wicking materials (cotton rope or cloth)
- Recycled soda bottles for reservoir hacks
- Reflective backing for shaded walls
- Rubber washers for sealing fabric panels
Now that your materials and mounting system are dialed in, it’s time to talk about one of the trickiest parts of vertical growing: keeping everything properly watered.
💧 Watering Techniques for Vertical Systems
Watering a vertical grow bag setup isn’t just about frequency — it’s about balance.
You’re working with gravity, fabric, and limited soil volume. That means the top dries out fast, while the bottom often stays soggy. If left unchecked, that imbalance can lead to root stress, rot, or drought symptoms — sometimes all in the same column.
But with the right strategy, you can turn watering from a frustration into a system.
Gravity Affects Your Vertical Grow Bag Watering:
- Upper bags dry out within hours in full sun.
- Lower bags collect runoff and can become overly saturated.
- Middle bags — ironically — are the most at risk of going unnoticed and drying out completely.
Here are your most effective options for vertical watering success:
Drip Watering
A slow-drip irrigation line (manual or automated) delivers consistent moisture to each tier.
- Run tubing from top to bottom along the back of your setup
- Use adjustable drippers for each bag or pouch
- Set timers to avoid daily manual watering
- Best suited for permanent installations or larger systems
💡 If using side-pocket bags, position the dripper just above each pouch opening for even soak-through.
Wicking Setups
Ideal for DIY towers, especially recycled bottle systems.
- Insert a cotton rope or strip of cloth through the bottom of each upper-tier container
- The wick draws moisture up from a lower reservoir or catch tray
- Keeps the soil evenly moist without soaking it
- Great for herbs, leafy greens, and shallow-root crops
💡 Wicks work best with consistent watering below. Refill your reservoir before it runs dry.
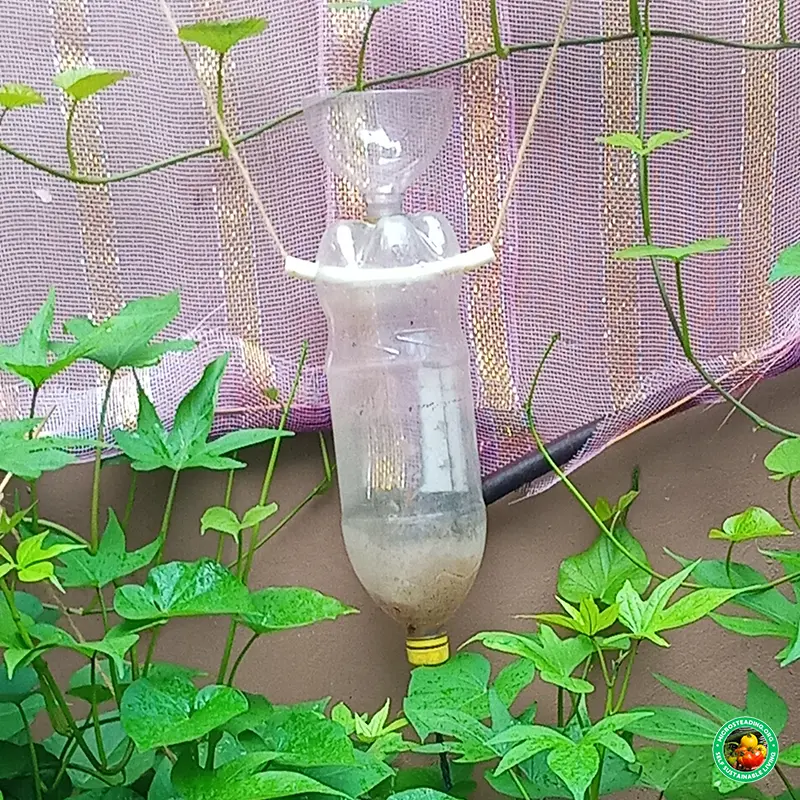
Bottles with Slow-Release Caps
No drip system? No problem.
- Fill 500ml–1L bottles with water
- Poke a small hole in the cap
- Insert upside down into the soil in each bag
- Water releases slowly over 6–12 hours
This is a low-tech but surprisingly effective way to prevent drought stress in upper tiers.
💡 Add a few drops of seaweed extract or compost tea to each bottle for passive feeding.
Bottom Catch Trays
Catch trays don’t just keep patios clean — they also serve as passive hydration systems.
- Place shallow trays under each row of bags
- Let runoff collect and slowly reabsorb into lower-tier bags via capillary action
- Can be lined with gravel or mulch to reduce splash and algae
💡 If overwatering is a problem, drill small overflow holes in the trays to prevent standing water.
For more in-depth strategies, you’ll want to review our guide on this exact challenge:
👉 Efficient Watering Techniques for Grow Bags
That guide goes deep into signs of underwatering vs. overwatering, provides tips on soil retention, and shows how to use mulch and shade covers to reduce water loss, which is especially helpful in vertical layouts.
With water managed, we're ready to consider sunlight next. Let’s discuss lighting angles, microclimates, and where to place which crops.
🌞 Light Strategy & Crop Placement
In a vertical garden, light doesn’t fall evenly. Every tier, every pocket, and every direction creates its own microclimate — and that’s not a problem… it’s an opportunity.
Smart growers don’t fight the light. They map it.
By understanding how the sun moves across your setup, you can match crops to the exposure they’ll actually get, not just what the seed packet says they want.
Setting Up Your Lighting Strategy
Top Row = Full Sun (6–8 hours)
This is prime real estate. It gets the most intense, direct sunlight and often the most wind exposure. The top row dries out fastest and heats up first in the morning.
Best crops: peppers, bush tomatoes, strawberries, basil, and dwarf cucumbers
Good for: crops that flower, fruit, or love heat
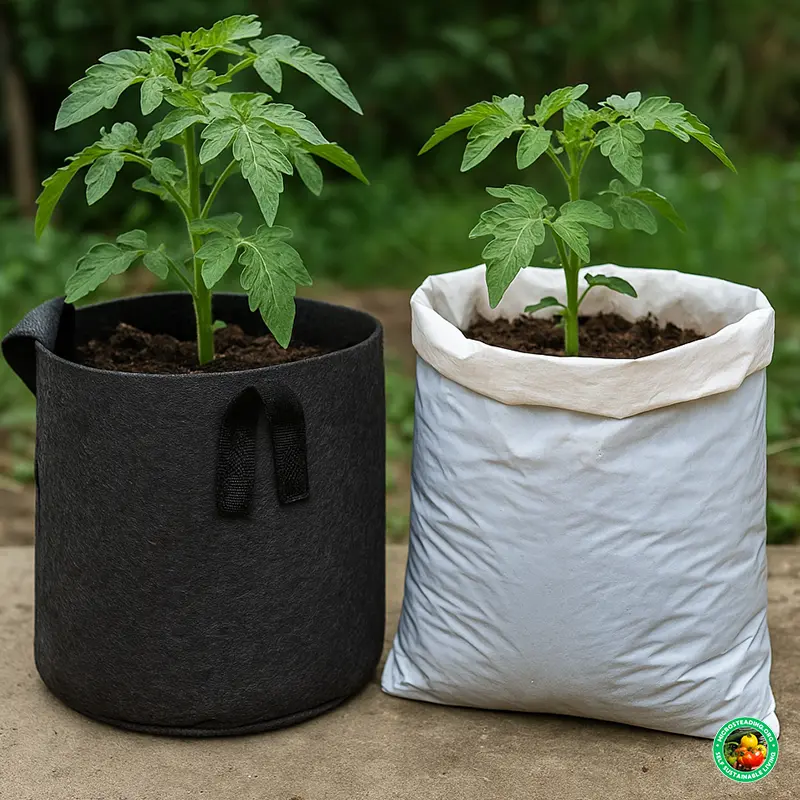
💡 Use light-colored grow bags to reflect heat if growing in hotter climates.
Middle Row = Partial Sun (4–6 hours)
Here’s where balance lives. The middle row is shielded slightly from above, but still receives strong morning or afternoon light, depending on your wall direction.
Best crops: lettuce, spinach, parsley, bush beans
Good for: fast greens that tolerate partial sun and appreciate airflow
💡 This tier also benefits most from drip lines or water catch — it’s the easiest to forget but the first to dry in windy weather.
Bottom Row = Filtered Shade (2–4 hours)
This zone is cooler, more humid, and more stable. It is perfect for crops that don’t like to bolt or that benefit from moisture retention.
Best crops: mint, chard, arugula, cilantro, thyme
Good for: anything that would usually struggle with midday sun
💡 Avoid fruiting crops here. You’ll get lots of leaves, but little harvest.
Wall Direction Makes a Difference
The direction your vertical system faces determines its microclimate — sometimes more than the season itself.
South-facing:
Most sun exposure all day long
Best for: tomatoes, strawberries, beans, peppers
Use shade cloth in midsummer if needed
East-facing:
Mild morning sun, shaded afternoons
Best for: leafy greens, herbs, sensitive crops like parsley and cilantro
West-facing:
Harsh afternoon sun, cooler mornings
Best for: heat-tolerant greens, dwarf fruiters
Monitor closely for sun scorch or drought signs
North-facing:
Minimal direct light — avoid unless you’re growing shade herbs only
💡 Use a compass app or Google Maps satellite view to determine your wall's true exposure.
If your system is portable (like on a rolling shelf or mounted trellis), consider rotating or adjusting every 2–3 weeks to balance exposure. When light is managed intentionally, you’ll notice better growth, fuller leaves, and more consistent yields.
⚠️ Common Mistakes to Avoid
Vertical gardening with grow bags might look simple — but once you add water, weight, and wind, small missteps can turn into big setbacks.
Below are the most common pitfalls new growers make. Avoid these, and your vertical system won’t just survive — it’ll thrive.
🚫 Overloading the Structure
Wet grow bags are heavy. Add soil, water, and root mass, and even a 3-gallon bag can weigh up to 10–15 pounds. Multiply that across five or six tiers and you're putting serious stress on your frame, hooks, or wall mounts.
Use proper hardware. Test weight before planting. And when in doubt, go lighter on the top tiers and reserve larger bags for ground-level racks.
💡 Always anchor into studs, masonry, or solid fencing — never drywall, loose siding, or panel board.
🚫 Poor Drainage → Rot
Grow bags drain better than most containers — but in vertical systems, water runoff compounds fast. Overwatering the top can turn the bottom tier into a swamp.
If your system doesn’t have a way to catch, redirect, or evenly absorb excess water, you’re at risk for:
- Root rot
- Algae and mold buildup
- Nutrient leaching
- Foul odors and compacted soil
Use bottom trays, slow watering, and a free-draining soil mix. Refer to our Efficient Watering Guide for more strategies.
🚫 Using Crops with Deep Roots
This one’s tempting. You’ve got a few carrot seeds or beet starters lying around, and those bottom pockets are just sitting empty…
Don’t do it.
Deep-rooted crops like carrots, beets, parsnips, and full-size tomatoes need more depth and horizontal root room than vertical systems allow. Even if they sprout, the roots will fork, twist, and underperform — leaving you with stunted, woody results.
Stick to shallow-rooted, fast-cycling, or compact varieties unless you're using modified vertical towers with 10+ gallon capacity at the base.
🚫 Skipping Airflow Considerations
Vertical doesn’t mean ventilated.
Bags hung too close together, especially on shady walls or in humid zones, can trap heat and moisture. That creates perfect conditions for mildew, damping off, and soft rot — especially on leafy crops.
Keep rows spaced by at least 12 inches vertically and 8–12 inches horizontally. Trim plants when they get leggy or overcrowded, and rotate or thin pockets if airflow gets blocked.
💡 Consider running a small fan near your system if it's in a covered patio or balcony with poor circulation.
Avoid these four mistakes, and you’re 90% of the way to a strong, productive, low-maintenance vertical grow bag system.
🔁 Seasonal Rotations & Companion Strategies
One of the biggest advantages of vertical gardening is how fast you can pivot with the seasons. Because grow bags warm up quickly, drain fast, and support fast-growing crops, your vertical system becomes the perfect tool for year-round productivity — as long as you know how to rotate and pair wisely.
Let’s start with seasonal strategy.
Spring Setup
As temperatures begin to rise, your vertical wall warms faster than open soil. That makes it the perfect zone for:
- Lettuce
- Spinach
- Arugula
- Cilantro
- Chard
- Strawberries
- Radishes
💡 These crops thrive in the cool mornings and filtered light of early spring. Use east- or southeast-facing systems to avoid harsh afternoon heat.
Summer Shift
Once the heat kicks in, shift toward compact, sun-loving crops.
Top and middle rows:
- Bush tomatoes
- Peppers
- Basil
- Mini cucumbers
- Pole beans (with rear trellis support)
Bottom rows:
- Mint
- Chard
- Shade-tolerant herbs
💡 Use shade cloth on the top row if sun exposure exceeds 8 hours daily — this prevents scorched leaves and bolting.
Fall Reboot
As temperatures ease back down, return to your spring crops — but now with upgraded soil and better compost integration from the summer round.
- Kale
- Lettuce
- Mustard greens
- Parsley
- Beets (only if you have deeper pockets or base grow bags)
💡 Fall is also an excellent time to plant garlic or overwintering scallions in bottom-tier bags.
Companion Planting in Vertical Systems
Just like ground gardens, vertical systems benefit from strategic crop pairings — but spacing is key.
Pair mint below lettuce
Mint loves moisture and shade. Lettuce benefits from the pest-repelling aroma. Don’t let mint escape containment, though — trim often.
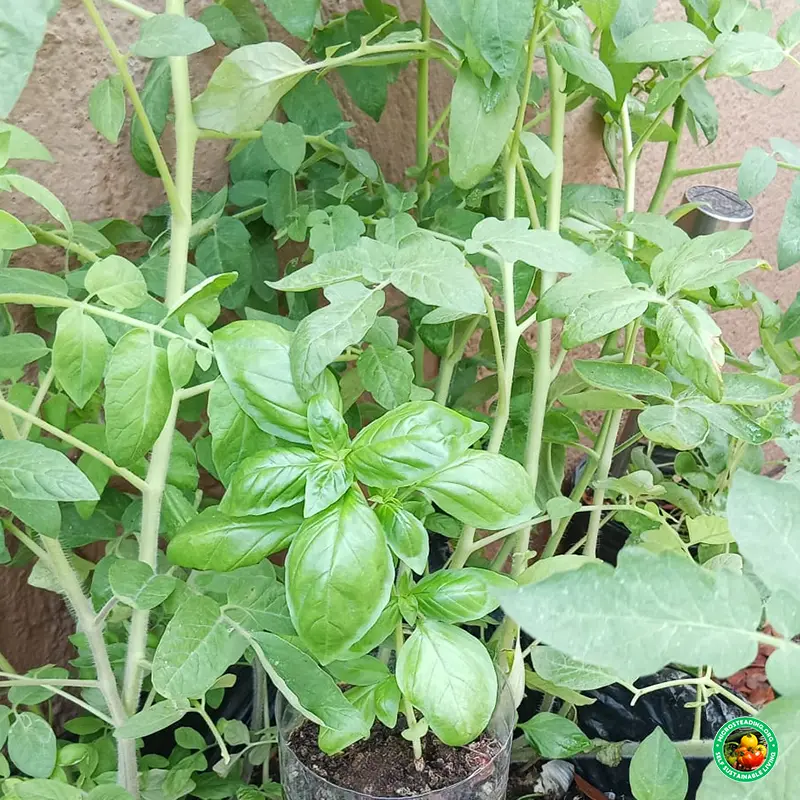
Place basil above or near tomatoes
These two grow beautifully together. Basil’s fragrance can deter pests, and harvesting from both is easy when they're on the same side of your panel or rack.
Grow beans behind or beside cucumbers
Both climb, both love sun, and both fix nitrogen — but give each a separate climbing support to avoid tangling.
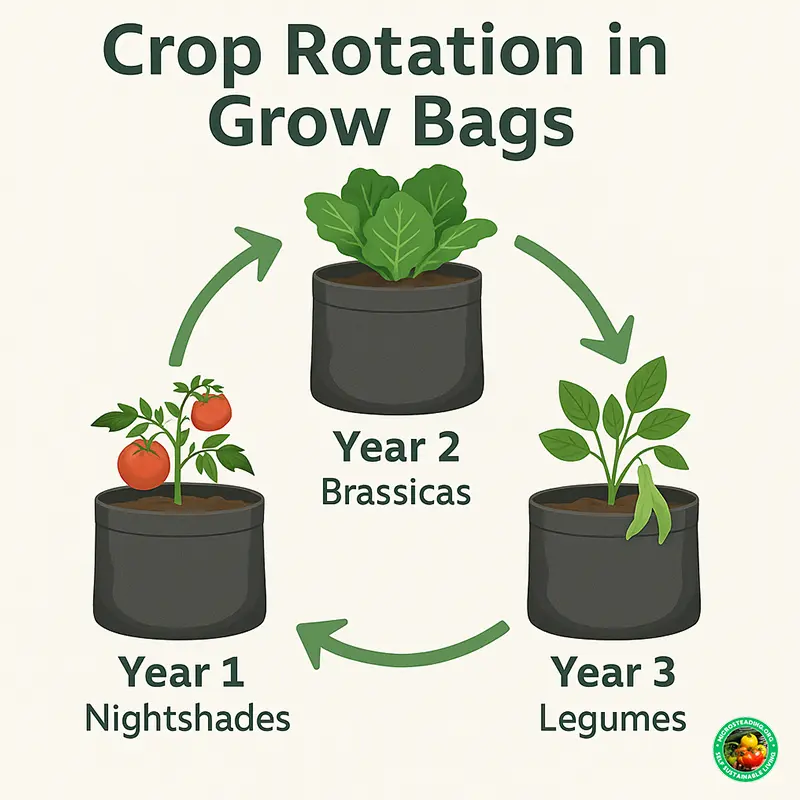
💡 Avoid planting multiple members of the same family (like several nightshades) in one panel. This increases pest risk and depletes similar nutrients from the soil.
Vertical Crop Cycling: Leaf → Fruit → Legume
This simple three-stage rotation keeps your soil balanced and maximizes output:
-
Leaf crops first
Quick-growing greens to get early harvests and prepare the soil. -
Fruiting crops next
Tomatoes, peppers, cucumbers — heavier feeders that benefit from the richer base left by leafy greens. -
Legumes last
Bush beans or peas fix nitrogen and rebuild soil health.
Repeat this cycle tier by tier across your vertical layout, adjusting by season. Over time, your bags become more fertile, your crops more productive, and your need for synthetic inputs drops significantly.
This isn’t just good planning — it’s microsteading at its smartest.
🧠 Advanced Tips & Experimental Setups
Once your basic vertical grow bag system is producing, you’ll start to see what’s possible. And that’s when things get fun. Because vertical gardening isn’t just efficient — it’s a canvas for experimentation.
This section covers some of the most effective, outside-the-box upgrades we’ve seen work in real-world microsteads. These aren’t beginner hacks — they’re power moves that push yield, reduce waste, and bring your system to the next level.
Vertical Hydro Grow Bags
Want explosive growth? Add water circulation.
Hydroponic grow bags (usually made from neoprene or lined fabric) use a closed-loop water system to deliver nutrients straight to the roots.
- Bags are stacked or hung vertically
- Nutrient-rich water flows from a reservoir, drips down, and recirculates
- Perfect for leafy greens, herbs, and strawberries
- Reduces water waste by up to 80% over traditional watering
💡 This setup requires a pump, timer, and light-proof reservoir — but the return is worth it if you want fast, consistent growth year-round.
Wicking Towers with Gravel Base
For a no-electricity, low-maintenance solution, build a vertical wicking tower.
- Use stacked containers or bottles
- Fill bottom with coarse gravel or lava rock as a water reservoir
- Insert a cotton cloth wick that rises into each soil level
- Top with light, airy mix (more on that below)
The wick pulls water up slowly and evenly, keeping soil moist without daily watering.
💡 This works incredibly well for small-leaf herbs, mint, lettuce, and spinach — especially in hot climates or places with water restrictions.
Using Reflective Surfaces to Boost Light
Sunlight is precious in vertical systems — especially for middle and lower tiers.
You can boost photosynthesis dramatically by adding reflective surfaces behind or beside your grow bags:
- Use mylar, aluminum foil, or white-painted wood
- Position them behind shaded pockets to redirect sunlight
- Even east-facing walls can act like south walls with a bit of reflectivity
💡 Be careful not to overdo it in hot regions. Reflective surfaces can also bounce heat. Use dappled cloths or position reflectors to avoid frying your crops.
Mixing Media Strategically by Tier
Here’s where you go pro.
Instead of using the same soil mix across your entire system, customize your media by location.
Upper tiers:
Use lightweight, quick-draining mixes like 50/50 coco coir and perlite. These dry out faster and benefit from airy structure.
Middle tiers:
Use a balanced blend — 40% coir, 40% compost, 20% perlite or vermiculite. This creates moderate retention and nutrition.
Lower tiers:
These stay wetter — so use more compost or worm castings, with added grit like pumice or rice hulls to prevent compaction.
💡 This tiered media approach matches water flow, crop needs, and gravity perfectly — giving every row its best shot at success.
Your vertical grow bag system doesn’t need to stay basic. With just a few upgrades, it becomes a full-fledged microstead engine — capable of producing serious food in seriously tight quarters.
🎯 Go Vertical - Grow Up. Literally
You don’t need a backyard to grow your own food.
You don’t need raised beds, square footage, or a perfect patch of soil.
What you need is a wall.
A railing.
A sunny corner.
And a grow bag.
Vertical gardening with grow bags takes what you already have — and multiplies it.
It turns fences into food systems. Patios into harvest hubs. And it transforms limited space into limitless opportunity.
This guide has given you the blueprint. You now know:
- Which crops thrive vertically
- How to design your layout tier by tier
- What materials to use and how to set it all up
- How to rotate through seasons, avoid the common mistakes, and experiment like a pro
And most importantly, you know this:
Small space is not a limit. It’s just a different kind of freedom.
Grow bags are forgiving. Vertical systems are flexible. And when you combine both, you unlock the kind of creativity that defines microsteading.
So here’s your next step:
Build one. Try one. Hack one together out of recycled bottles if you have to.
Because vertical gardening doesn’t just grow plants — it grows confidence.
👉 Ready to fine-tune your setup even more?
Check out our next guide: Choosing the Right Size Grow Bag — and make sure your plants get the root space they deserve.
You’ve learned how to grow up.
Now it’s time to grow smart.

About the Author:
Carl Riedel is the founder of Microsteading.org and a passionate small-space grower based in Curaçao. He specializes in grow bag gardening, sustainable methods, and teaching others how to thrive in limited spaces.